INSTALL YOUR PROJECT
Planting: Best Practices Meadow Seeding Methods Cover Crops in Meadows Seeding: Hand-Broadcasting Seeding: Drilling Deer-Proofing
Planting: Best Practices
Our case study sites consistently found that a little planting education was helpful for the enthusiastic volunteers who showed up on planting day. Longtime gardeners can forget what it’s like to be a novice, so demonstrating planting techniques early can make a big difference in the health of the plants. Here are a few planting techniques to know, or to make your volunteer group aware of:
Digging Tools: Holes for plugs can be dug using soil knives, or more expediently with a battery-powered auger or trowel in most soils. For larger plants (quart pots or bigger), holes may be hand dug with shovels, or using an auger.

A handheld gas-powered auger can be used to dig planting holes quickly. Photo: Adam T. Deen
Planting Bare Root Plants: Soak roots in water for 30 minutes to four hours prior to planting. It’s best to plant on a cloudy day, or at least keep the plants in the shade while you plant (in their soaking bucket). Exposing the roots to sun and wind can kill the plant. When planting, don’t coil the roots in the hole – spread them out, digging out small channels for any long trailing roots.
Planting Trees: Plant the tree at the same depth as in the nursery pot or, for bare root trees, at the same depth it grew in the soil (usually visible as a color shift just above the roots). A good comprehensive guide to planting trees (bare-root, potted, or balled and burlapped) is available from the Arbor Day Foundation.

Photo: Adam T. Deen

A mulched native plant hedgerow on Bard College’s campus, Red Hook, New York. Photo: Adam T. Deen
Hole Sizes: For all plants, holes should be at least 1.5-2x wider than the plant to allow space for spreading out the roots during planting. Each plant should be planted at the same depth at which it grew in its pot at the nursery, no shallower and no deeper. Although bare root plants can appear small, they also need wide holes with plenty of space for their long roots.
Planting Containerized Plants: Remove the plant from its pot and loosen any matted roots at the bottom or sides of the root ball (but don’t remove any roots!) Place the plant in the hole so that it’s at the same level in the soil that it was in the pot. Make sure that no roots encircle the plant, even if you need to cut them. Circling roots can strangle the plant later.
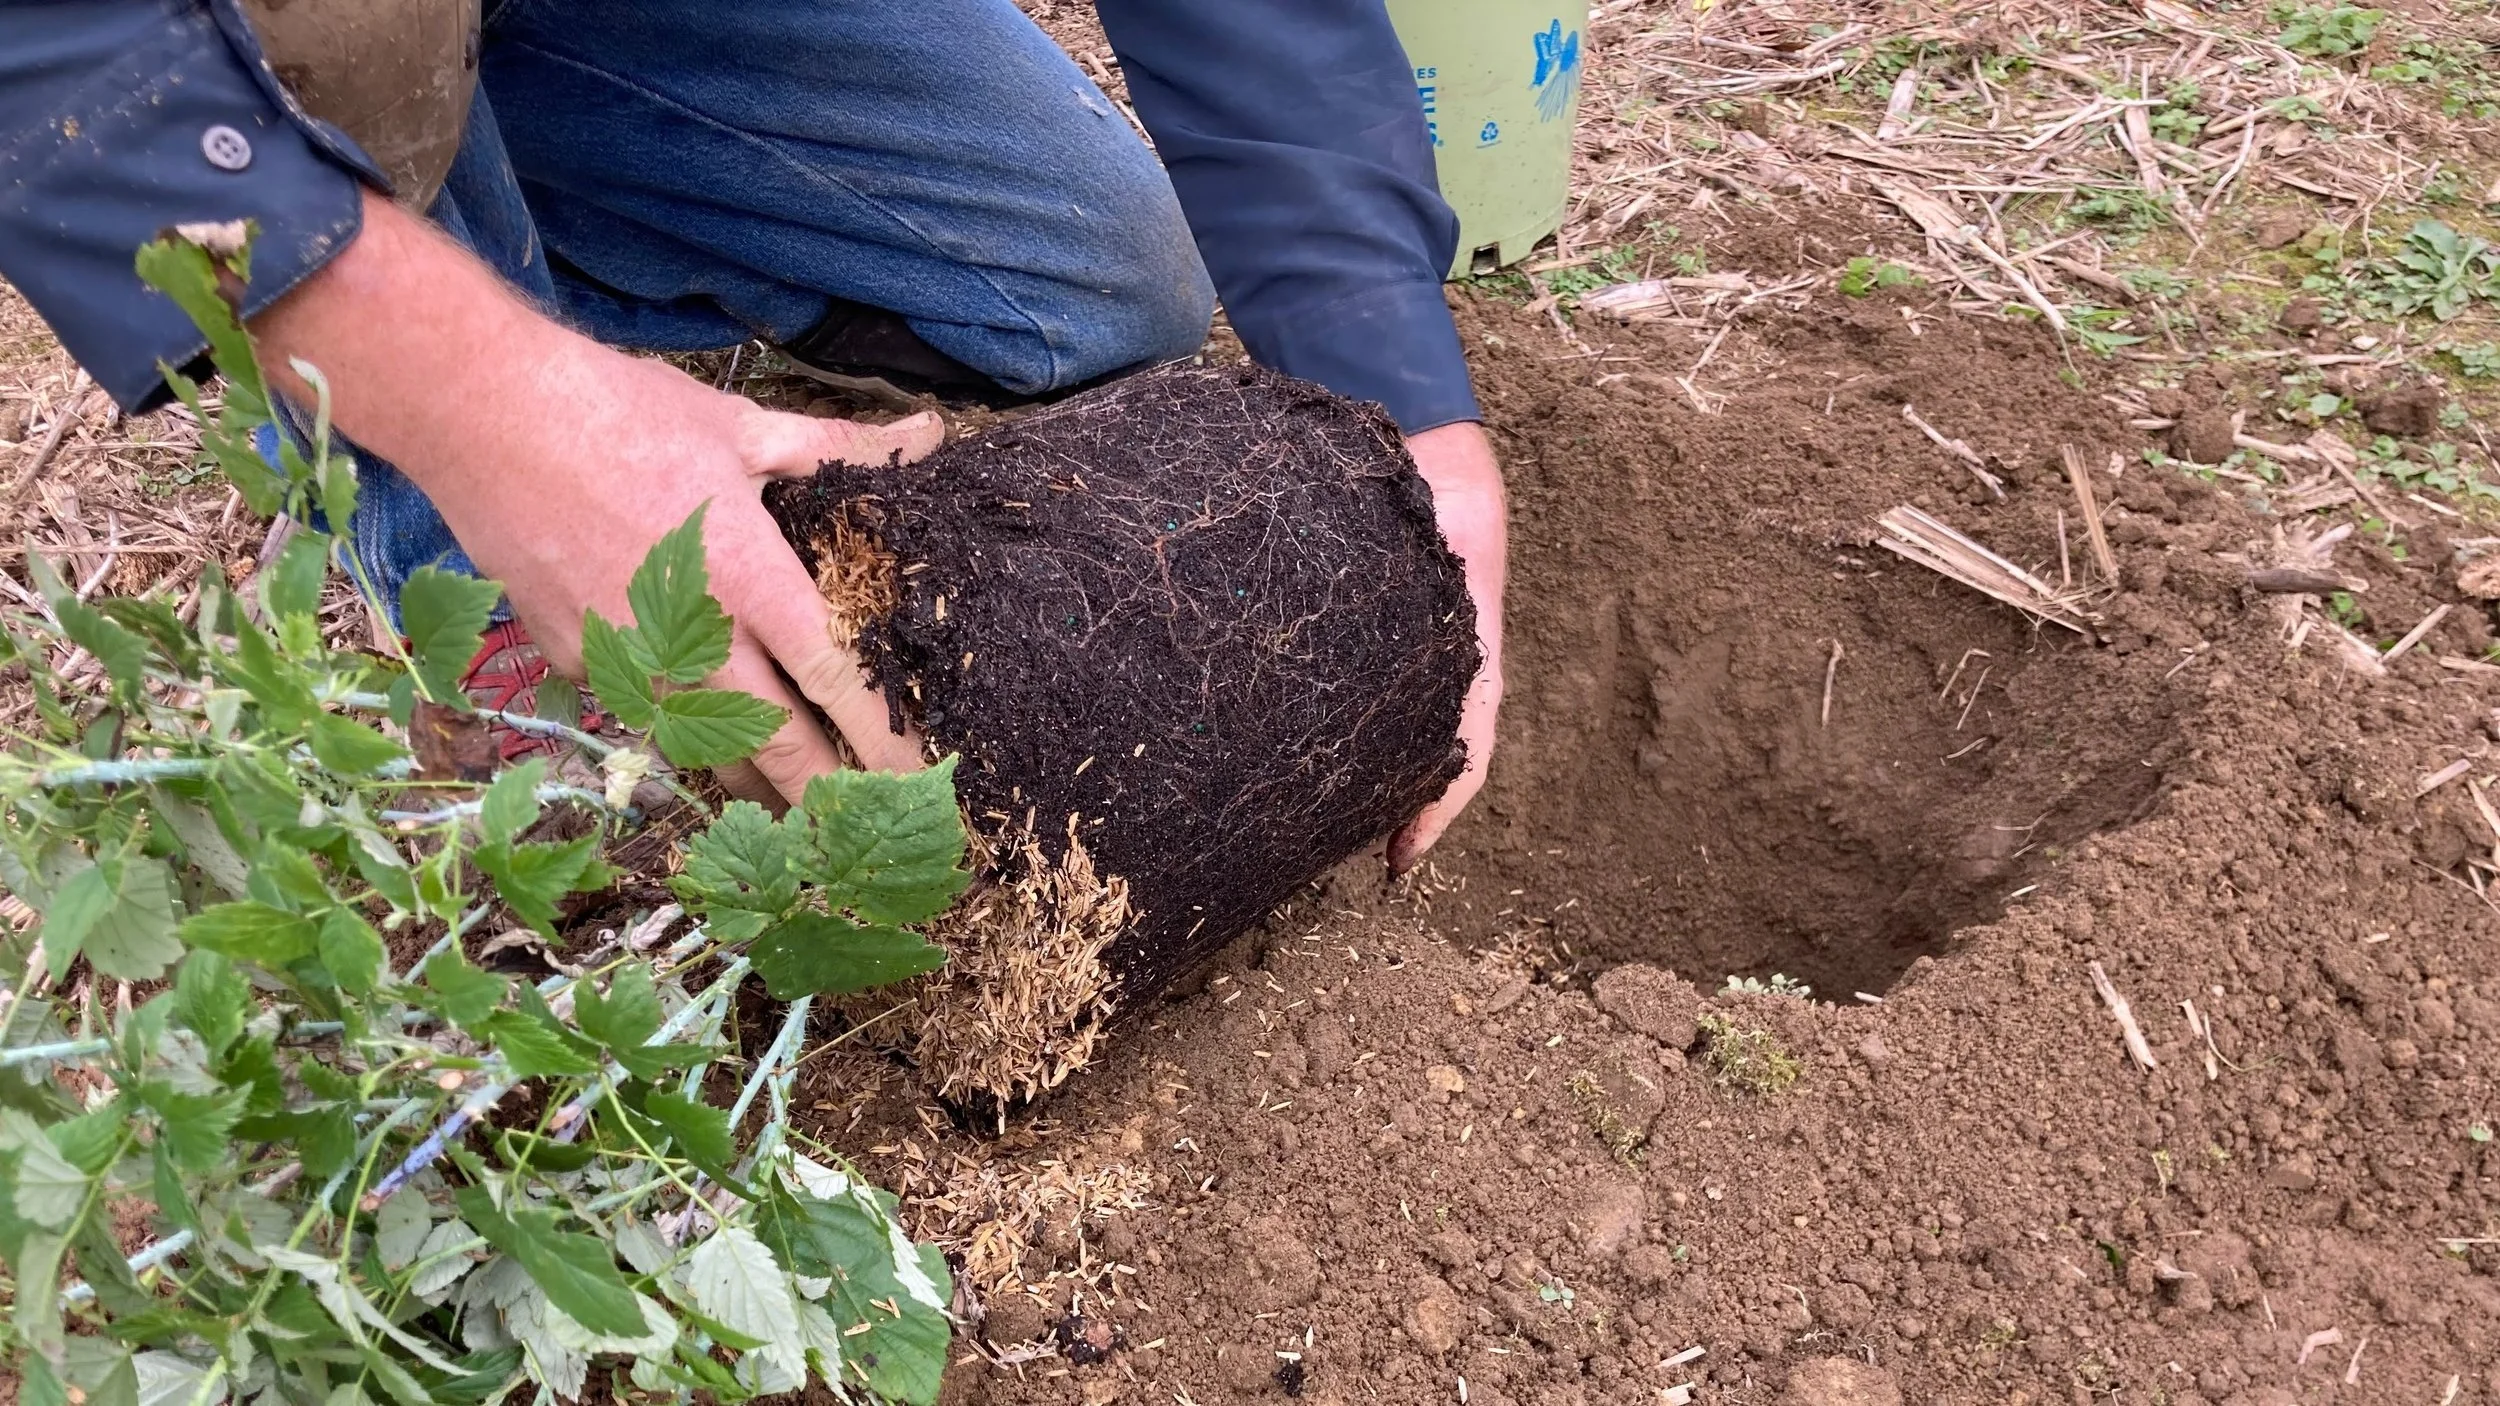
Gently loosen roots around the edge and bottom of container-grown plants. Photo: Adam T. Deen
Filling holes: Backfill all holes fully with the soil removed from the hole, ensuring no air pockets. Gently tamp down the filled hole with your hands or feet.
Watering: Give all plants a thorough watering right after planting. This is especially important for actively growing plants and for all spring plantings. Water every day during the first week after planting. After that, the soil should be saturated with water to a depth of 2-3” once a week during the first growing season if needed depending on rainfall. After the first full season, most native plants can thrive with natural rainfall alone.
Mulch: One to two inches of wood chip mulch can be applied around container plants at planting time (right after planting and watering for large plants, or before planting for plugs, to prevent crushing small plants with large shovelfuls of mulch). Do not allow the mulch to touch the stems; maintain 1-2” of space between mulch and stem to avoid rotting the stem with damp mulch. This is especially important for young trees! Use undyed, untreated, and peat-free mulch made from bark or hardwood - local arborists are often happy to deliver a truckload. Don’t plan to replenish your mulch once it decomposes. Mulch holds soil moisture and suppresses weed growth, which gives plants a competitive edge during their first season; but after that your plants should fill the space.